
24 October 2026
How to Photograph Handmade Projects at Home
By OpenClip
Use soft daylight, a quiet background and three clear views to photograph handmade projects faithfully at home—without specialist equipment.
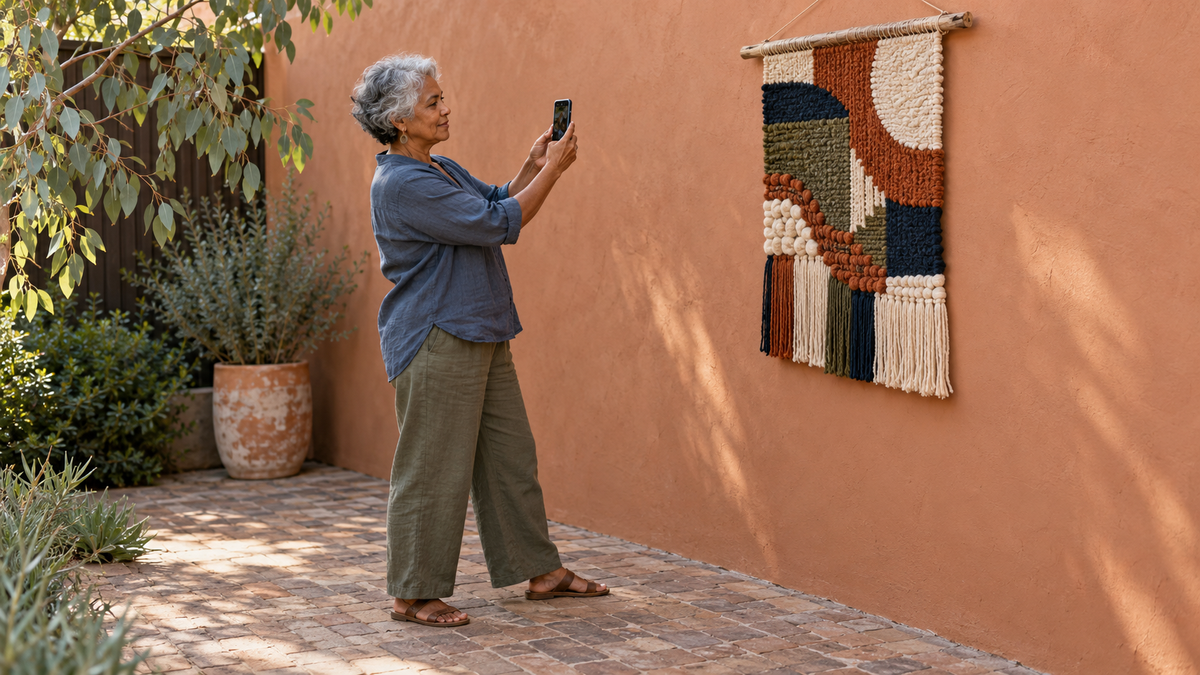
You can photograph a handmade project well at home without specialist equipment. Start with soft daylight, a quiet background and a clean camera lens. Show the whole piece first, then move closer for texture and details. Keep colours honest, straighten the frame and take several versions before choosing the image that best reflects what you actually made.
Begin with the story you want the photograph to tell
Before moving furniture or reaching for your phone, decide what matters most about the finished project. Is it the overall shape, the colour relationship, a carefully finished edge or the way the piece belongs in a room? A photograph becomes clearer when it has one main job.
For a framed or hanging piece, your first image might show the complete work straight on. For a cushion, ornament or sculptural object, a three-quarter angle can explain its depth. If the material is the attraction, plan a second close view rather than trying to show every quality in one crowded frame.
Find soft light before arranging the background
Soft, indirect daylight is a forgiving starting point. Try a bright room near a window, a shaded verandah or an outdoor wall that is not in harsh sun. Turn off nearby lamps if they make one side of the project yellow and the other blue.
Direct midday light can create hard shadows and bleach pale textures. If the only window receives strong sun, move the project farther into the room or wait until the light becomes gentler. A sheer curtain can diffuse light, but keep fabric safely away from candles, heaters and hot lamps.
Look at the project with your eyes before looking at the screen. If its colour appears accurate and the surface still has visible texture, the light is probably useful.
Choose a background that supports the work
A calm background does not have to be plain white. Warm plaster, painted timber, a clean shelf, a neutral cloth or an uncluttered patch of wall can all work. The important point is separation: the project should not disappear into a pattern of similar colours and shapes.
Remove distracting cables, packaging, labels and unrelated objects from the edges of the frame. Leave one or two contextual details only if they help explain scale or how the finished piece might be used. When styling a room view, the same restraint helps you display handmade art without creating visual clutter.
Make the first image simple and complete
Clean the phone lens with a soft lens cloth. Hold the phone level, keep it parallel to flat artwork and step back slightly rather than using a very wide setting at close range. This reduces stretched corners and makes the finished shape easier to read.
Tap the project on the screen to set focus. If it looks too bright, use the exposure control to darken the image a little; if dark fibres lose all detail, lift it gently. Avoid digital zoom, which can soften fine texture. Moving your feet usually gives a clearer result.
Take both a horizontal and vertical version if you may share the work in different places. Leave a little breathing room around the edges so that later cropping does not cut into tassels, frames or handles.
Add close-ups that reveal the making
Once you have a reliable full view, photograph the details that make the piece yours: a join, layered paper edge, tufted area, stitch change or colour transition. Move closer until the detail is clear, then check that the phone has focused on the intended surface.
Three useful images are often enough:
- The full piece: a clear record of the finished shape and composition.
- The material detail: a close view of texture, edges or workmanship.
- The piece in place: a wider image showing scale and how it lives in a room or outdoor setting.
If colour is central to the project, compare the photograph with the real piece in the same light. Our guide to testing a craft colour palette with material samples can also help you notice how value and texture change under different lighting.
Edit lightly and keep the colours believable
Small adjustments to crop, straightness, brightness and contrast are usually enough. Correct a tilted horizon or wall line before changing colour. Heavy filters can turn cream fabric yellow, mute cool blues or make texture look harsher than it is.
If the automatic image looks wrong, try the original photograph beside the finished piece and reduce any edit that changes the material itself. The aim is not to make the project look commercially perfect. It is to help another person see the colour, form and hand-finished character that you see.
A quick checklist before you finish
- The complete project is visible and in focus.
- The background is quiet and the frame edges are clear.
- Light is soft enough to preserve texture.
- Colours remain close to the real materials.
- One close-up shows a meaningful detail.
- No private documents, addresses, faces or reflections appear unintentionally.
If you are planning your next piece, browse the OpenClip crafting collection and check the individual product page for verified contents, dimensions and requirements.
Frequently asked questions
Do I need a camera to photograph handmade projects?
No. A recent phone can make a clear record when the lens is clean, the light is soft and the phone is held steady. Good light and careful framing matter more than specialist equipment for most everyday photographs.
What is the best background for craft photography?
Choose a simple background with enough contrast to separate the project from its surroundings. A neutral wall, timber surface or plain cloth can work, but the best choice depends on the project’s colour and shape.
How do I photograph texture without harsh shadows?
Use soft light from the side rather than direct frontal sun. A slight angle can reveal relief in stitching, fibre or paper while keeping the darkest shadows detailed.
Should I use filters on handmade project photos?
Use filters cautiously. Light cropping, straightening and brightness adjustment are usually more helpful. Keep the material colours believable, especially if the photograph will help someone understand the finished result.
Let the work remain the focus
A thoughtful photograph does not need elaborate styling. Give the project enough light, space and attention to make its qualities visible. Record the whole piece, preserve one or two details, and stop editing before the image loses the character of the materials. The result will feel clear, personal and true to what you made.