
17 October 2026
How to Present a Handmade Gift Without Overwrapping It
By OpenClip
Present a handmade gift with care rather than excess: finish and protect the piece, choose one simple wrapping system and add a short useful note.
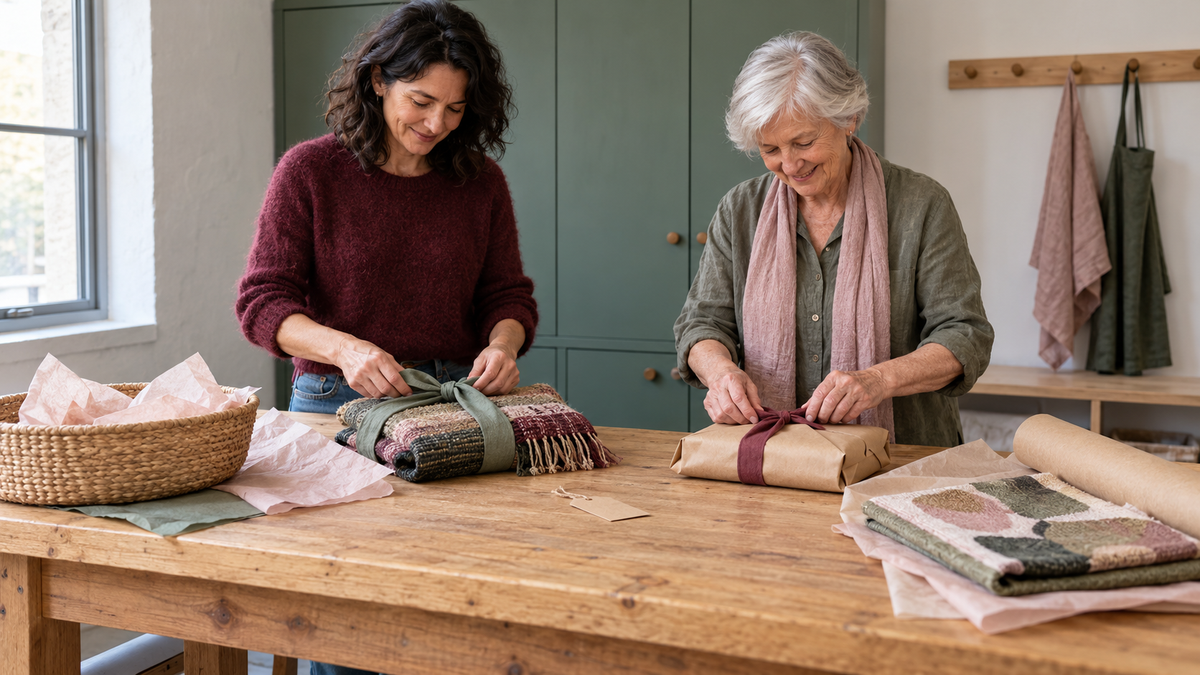
A handmade gift does not need layers of elaborate wrapping to feel special. Finish and protect the piece first, then use one clear presentation idea: a cloth ribbon, a simple paper wrap or a well-sized box. Add a short note about the making or care of the item, and let the work itself remain the focus.
Finish the object before thinking about decoration
Presentation begins with the handmade piece, not the ribbon. Give yourself enough time to complete the ordinary finishing that can be overlooked near a deadline: trim loose threads, remove removable markings, check that parts are secure and gently clear away dust or fibres. Follow the material’s own care instructions rather than improvising with heat, water or cleaning products.
Look at the work in daylight and from the distance at which it will be used or displayed. A tiny irregularity that is part of the handmade character may need no attention. A loose edge that could catch during transport does. The aim is not to make the work look factory-made; it is to give it a considered final state.
Protect first, then make it beautiful
Good wrapping keeps the object clean, supported and easy to open. Decoration comes after that practical layer.
For a soft textile, fold along natural lines rather than forcing it into a very small box. Place clean tissue between areas that could rub or catch. A framed or rigid piece needs corner protection and a firm outer container so it cannot slide. Small dimensional work may need a shallow box with soft, plain packing around it rather than pressure on the surface.
If the gift includes sharp, fragile or detachable parts, secure them separately and explain how to handle them. Do not rely on ribbon to hold weight or stop movement. When posting a handmade gift, the parcel needs transport-safe packing in addition to its decorative presentation.
Choose one wrapping language
A restrained wrapping scheme often looks more confident than several competing ideas. Choose one base material, one tie and one small finishing detail. For example:
- plain kraft paper, a wide fabric ribbon and a small blank tag;
- soft tissue inside a reusable box with cotton tape;
- a clean fabric wrap tied with a contrasting strip; or
- a simple sleeve of paper around a folded textile, finished with cord.
Let colour come from the work. If the piece is richly patterned, quieter packaging gives it space. If the gift is largely neutral, one wine, eucalyptus or ochre accent can make the presentation feel deliberate. The guide to choosing a craft colour palette can help if you want a compact colour plan without matching every shade.
Use ribbon where it has a job
Ribbon is most useful when it closes, gathers or creates an easy opening point. A broad cloth ribbon can secure a folded scarf without cutting into it. Cotton tape can hold a paper sleeve in place. A fabric tie can be reused later for storage or another gift.
Avoid pulling a tie so firmly that it creases paper, compresses soft work or marks a frame. If the package needs structural strength, use an appropriate box or protective wrap beneath the decorative layer. A bow should not be doing the work of a closure.
Add a note that gives useful context
A short note can connect the recipient to the making without turning the gift into a formal presentation. Two or three sentences are enough. You might include the name of the technique, the reason you chose the colours, or one practical care instruction.
Keep the note factual and personal. Avoid apologising for the time it took, pointing out every irregularity or asking the recipient to respond in a particular way. A handmade gift does not need a defence. If care is important, make the instruction clear: whether the piece should be kept dry, displayed away from strong direct light or cleaned in a particular manner should come from the actual materials and method used.
Make opening simple
A beautifully wrapped object can become awkward if every layer needs cutting or if the recipient cannot tell which side is up. Leave a visible end on the ribbon, use a lid that lifts cleanly and avoid tape directly on fabric or finished surfaces. For a framed piece, mark the protective outer packaging rather than the artwork.
Consider who will open the gift without making assumptions about age or ability. Knots should be secure but not punishing. Small ties and loose decorations should not scatter everywhere. If several pieces belong together, group them clearly so nothing is mistaken for packing and discarded.
Prepare gifts in a calm sequence
If you have more than one handmade gift to finish, move through the same order: inspect, protect, wrap, tie, add the note, then label the outer package. Complete one gift before opening all the materials for the next. This reduces mix-ups and keeps delicate work away from tape, ink and scraps.
The earlier guide to planning handmade Christmas projects without the rush can help with the making schedule. For presentation day, set out only the wrapping materials you have decided to use. More choice at the table rarely improves a plan that is already working.
A useful final check
Before the gift leaves your hands, ask five practical questions:
- Is the handmade piece fully finished and clean?
- Can it move, bend or rub inside the package?
- Can the recipient open it without touching a delicate surface?
- Does any important care information need to travel with it?
- Does the outer presentation support the work rather than compete with it?
If all five answers are settled, stop adding. A little empty space and a clear material choice can make the gift feel more generous, not less.
Let the making remain the main event
The most memorable part of a handmade gift is the attention held in the object. Packaging should protect that work, introduce it and then get out of the way. Start with a finished piece, choose one simple wrapping system and include only the context the recipient needs.
If you are planning a future project to make or give, browse the current Crafting collection and check each product page for its exact contents, materials and requirements before choosing.
Frequently asked questions
What is the simplest way to wrap a handmade textile?
Fold it along natural lines, add clean tissue if surfaces may rub, and secure it with a broad cloth ribbon or a paper sleeve. Avoid tight string that can leave an indentation.
Should I include a care card?
Include one when the material needs specific handling, cleaning or display conditions. Keep it short and base it on the actual fibre, finish and technique used.
Is reusable fabric wrap suitable for every gift?
No. It works well for many soft or boxed items, but a fragile framed or dimensional piece still needs firm protection underneath. The reusable layer is presentation, not structural packaging.
How do I wrap a handmade gift for posting?
Complete the decorative wrap first, then place it inside transport-safe packaging with enough support to prevent movement and impact. Follow the carrier’s current packing rules for the item and destination.
Does simple wrapping look unfinished?
Not when the materials are clean, well sized and intentionally chosen. One paper, one tie and a useful note can feel more considered than several decorative layers.