
3 November 2026
A Simple Colour Reset for Half-Finished Craft Projects
By OpenClip
Restart a half-finished craft project by keeping one colour you still like, reducing the palette and testing one reversible next step.
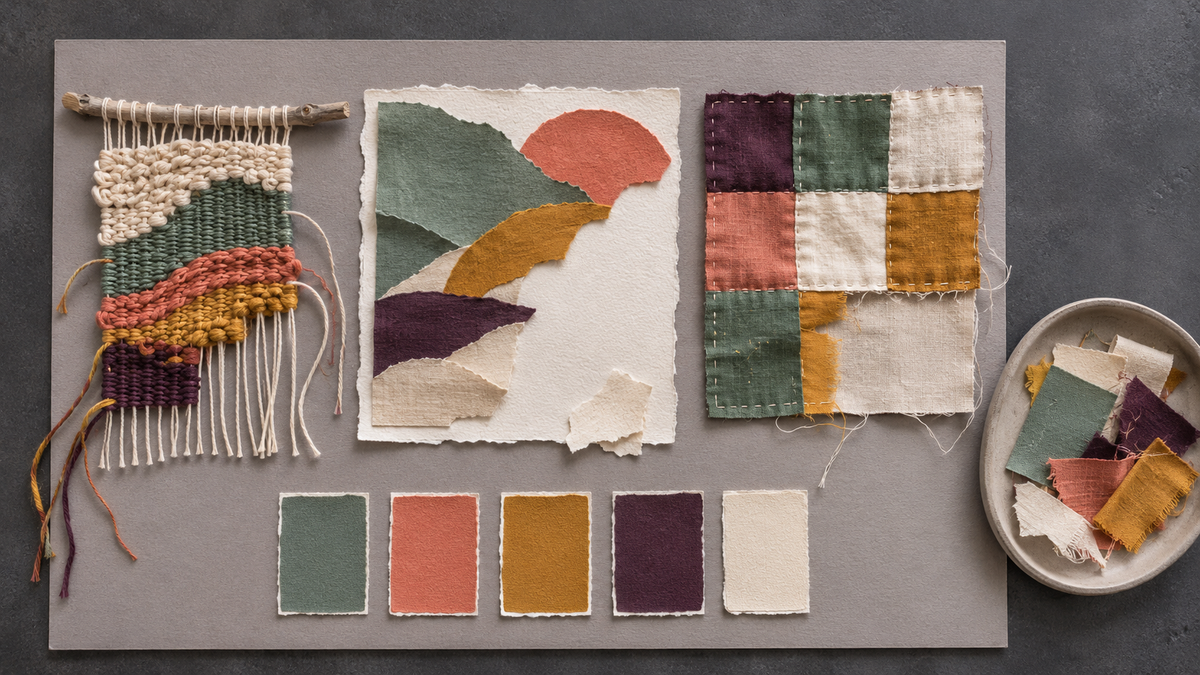
A colour reset is a calm way to restart a half-finished craft project without undoing everything you have made. Keep the part you still like, reduce the palette to three to five colours, and test one small next step before committing. The aim is not to rescue every project; it is to make the next decision feel clear.
Begin with the part that still feels right
When a project stalls, it is tempting to focus on everything that looks unresolved. Start elsewhere. Find one element you would genuinely choose again: a deep green fabric, the shape of a collage, a woven section with good texture, or a warm neutral background.
That element becomes the anchor for your colour reset. It does not need to be the largest area or the most expensive material. It simply needs to give you a useful direction. If nothing feels worth keeping, setting the project aside may be the better choice. A reset is an option, not an obligation.
Take a visual inventory before adding anything
Lay the project on a plain surface in good, neutral light. Move unrelated materials out of view, then note what is already present. You are looking for three things:
- The anchor: the colour or material you want to preserve.
- The supporting colours: tones that already sit comfortably beside it.
- The interruption: a colour that dominates, competes or makes the project feel harder to read.
The interruption is not automatically a mistake. A bright patch may only need to appear once more in a smaller area so it feels intentional. A dark section may need a lighter neighbour. Sometimes the palette is already sound and the real issue is that too many unfinished edges are visible at once.
Reduce the palette to three to five colours
A smaller working palette gives each new choice a boundary. Pull out scraps, threads, papers or paints that match the colours already worth keeping, then choose three to five. Include at least one quiet colour that gives the stronger tones some breathing room.
A practical balance might include:
- one anchor colour;
- one lighter or softer version of it;
- one contrast colour used in smaller amounts;
- one neutral; and
- an optional dark tone for definition.
You do not need to match colours perfectly. Slight variation can make handmade work feel layered and lively. The useful question is whether the colours belong to the same visual conversation when viewed together.
If choosing from a large stash feels distracting, try the sorting ideas in How to Organise Fabric Scraps So You Can Use Them. For a more detailed sampling method, see How to Test a Craft Colour Palette Before You Begin.
Test the reset away from the project
Before cutting, stitching or gluing, make a small colour study. Place your selected materials side by side on a plain card, or arrange them near the unfinished work without attaching them. Photograph the arrangement, then look at it again at thumbnail size. This makes broad colour relationships easier to notice.
Try two versions rather than ten. In the first, let the anchor colour lead. In the second, give the neutral more space. Compare them from a short distance and notice which version lets your eye settle more easily.
If you work with paint or dye, test on a separate scrap that behaves like the original material. Wet colour, dry colour and colour under varnish can differ. Follow the product instructions and keep the test separate until it is fully dry.
Choose one reversible next step
The best first move is usually small and easy to reconsider. Pin a fabric piece rather than sewing it immediately. Place collage shapes without adhesive. Wind a little yarn around card to judge proportion. Cover a distracting area with a temporary paper shape before deciding whether to remove or replace it.
Then pause. View the project upright, from across the room and in a quick phone photograph. You are not asking whether it is finished. You are checking whether the palette now gives you a clearer next decision.
Decide what the project needs now
After the test, choose one of four honest outcomes:
- Continue: the reduced palette has restored a useful direction.
- Simplify: remove or cover one competing section and keep the rest.
- Repurpose: turn the strongest part into a smaller object, sample or framed study.
- Release: photograph what you learned, recover usable materials and let the project go.
None of these outcomes is a failure. A half-finished piece has already shown you something about colour, scale, texture or the kind of making you want to do next.
Keep the reset visible but contained
Place the project and its selected palette together in one shallow tray, folder or project bag. Return the rest of the stash to storage. This keeps the next session visually simple without turning organisation into another large task.
If you would rather begin with something different, browse the current OpenClip craft collection for another project that catches your eye. You do not need to earn a new start by finishing every old one.
Common questions about colour resets
Do I have to remove the colours that are not in the new palette?
No. Existing colours can remain as small accents. The reduced palette is mainly a guide for what you add next.
How many colours are too many?
There is no universal limit, but three to five working colours are easier to compare during a reset. A complex finished piece may contain more.
What if the project still does not feel right?
Try simplifying its size or purpose rather than adding more. A strong section may become a small framed sample, card front or material reference.
Should I buy new materials for the reset?
Not necessarily. Start with what you already have. Buy something only when the test reveals a specific missing colour or material and you have checked that it suits the project.
A clearer next move is enough
A colour reset does not need to produce an instant finish. Keep one thing you like, edit the choices around it and test a reversible step. If the project becomes inviting again, continue at your own pace. If it does not, you can still keep the useful lesson and make room for something new.