
16 September 2026
How to Set Up a Galaxy Projector in a Small Room
By OpenClip
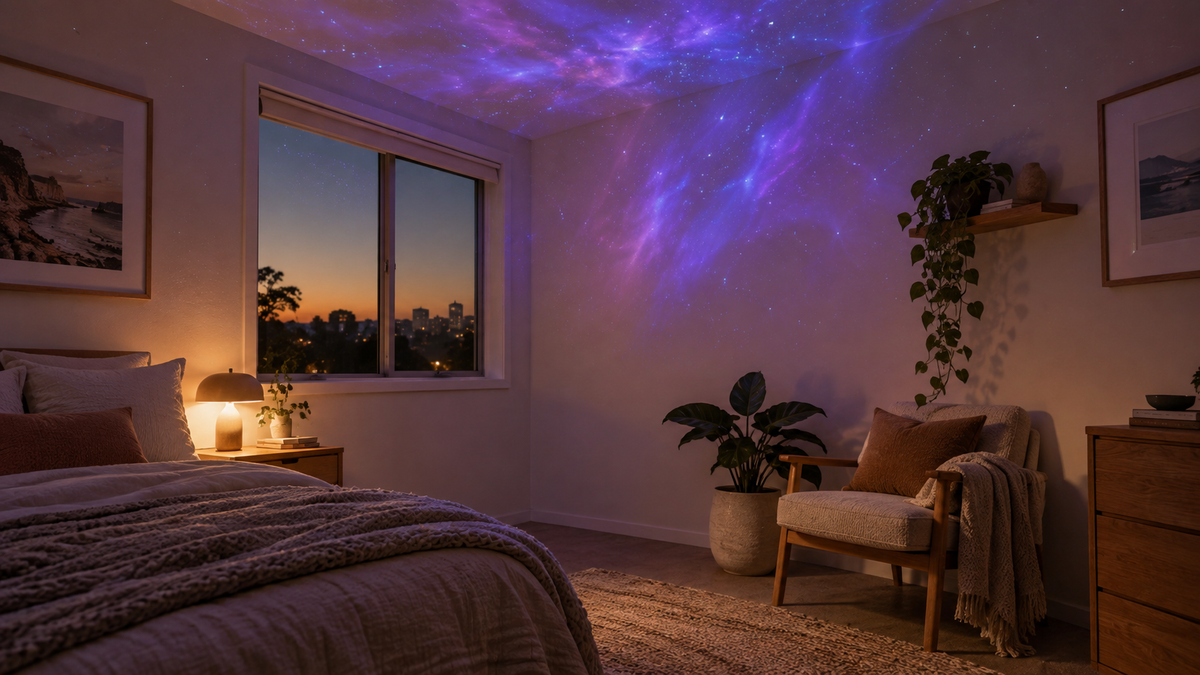
A galaxy projector works best in a small room when you give it one clear wall or ceiling surface, reduce competing light and adjust its position before fine-tuning focus. Start with the simplest layout: choose the surface, connect a suitable USB power source, aim the flexible neck, insert one slide and turn the focus ring until the image looks clear.
Choose the projection surface before choosing the position
The clearest setup begins with the surface, not the projector. Look for a wall or section of ceiling that is uncluttered and easy to see from the place where you will sit. Pale, plain finishes usually make it easier to see the pattern than dark paint, busy wallpaper, framed artwork or open shelving.
You do not need an empty room. In a bedroom, the ceiling above the foot of the bed can be more practical than the wall behind a television. In a reading nook, a clear upper wall can become the focal point while keeping the chair and side table usable. The aim is to create one deliberate viewing area rather than trying to cover every surface.
Reduce competing light without making the room impractical
Projected patterns become easier to see when nearby lighting is lower. Close a blind at dusk, switch off a bright ceiling light and keep any necessary lamp directed away from the projection surface. You can still retain enough warm ambient light to move around safely.
MoonWhisper also has a warm night-light mode, so projection and general room lighting should be treated as two different choices. Use projection mode when you want a pattern on the wall or ceiling. Choose the warm-light mode when a simple local glow suits the room better. Avoid placing the unit where it creates glare in your direct line of sight.
Plan a safe, tidy USB power route
MoonWhisper connects through USB-A. Select a suitable USB power source and keep the connection supported rather than allowing the cable or flexible neck to carry unnecessary strain. The power source should sit on a stable surface with ventilation appropriate to that source.
Keep the route out of walkways, away from bedding and clear of places where a child or pet could pull it. Do not stretch a lead across a doorway or place the connection where it may be crushed by furniture. If the available power point creates a poor cable route, change the furniture position or choose another projection surface rather than accepting a trip hazard.
Start close, then adjust distance and angle
There is no single perfect placement for every room because wall size, ceiling height, surface colour and ambient light all affect the result. Begin with the projector closer to the chosen surface and make small changes. Moving it can change the apparent size and brightness of the pattern; adjusting the flexible neck changes where it lands.
Make one adjustment at a time:
- Place the power source on a stable surface.
- Connect the USB-A plug to that suitable source.
- Aim the flexible neck towards the clear wall or ceiling area.
- Insert the chosen projection slide fully.
- Turn the ridged focus ring until the pattern looks clear.
- Move the position slightly only if you want a different image size or placement, then refocus.
This sequence helps you identify what changed. If you move, bend and focus everything at once, it is harder to tell which adjustment improved the image.
Use furniture that supports the angle
A bedside table, low shelf or compact console can work when it is stable and leaves the controls accessible. Avoid balancing the power source on stacked books, soft furnishings or a narrow edge. The flexible neck is designed to be adjusted by hand, so use it for aiming rather than propping the unit against another object.
For a ceiling projection, a lower position may offer a useful angle without taking over the room. For a wall, a shelf facing the clear surface can keep the setup visually tidy. Leave enough space around the setup to change the slide and turn the focus ring without moving other objects.
Choose one projection slide for the room's purpose
MoonWhisper is available with either six or twelve projection slides, and the two sets contain different selections. Choose by looking at the product images and pattern lists rather than assuming the larger set is automatically right for every room.
In a small room, one pattern is usually enough to establish the visual focus. Start with a slide that suits the wall area and the colours already in the room. A restrained setup lets you assess clarity and placement before changing patterns. Store unused slides together so their surfaces stay easy to handle and locate.
Create a simple evening zone, not a crowded display
Projection has more impact when the rest of the room is calm. Keep the viewing surface clear and limit competing decorative lighting. A chair, cushion, blanket or small table may be all the room needs. If you prefer a more neutral daytime look, switch the projector off and let the furniture remain the permanent part of the arrangement.
For a complementary non-projected light source, see the guide to styling a Japandi paper table lamp in a small room. If your priority is a structured morning lighting routine rather than an evening projection, the DawnOne setup guide addresses a different use case.
Troubleshoot a blurry or weak-looking projection
If the image looks blurry, first turn the manual focus ring slowly. Then check that the slide is inserted correctly and the flexible neck is not drifting away from the intended surface. If the pattern remains difficult to see, reduce nearby light or try a plainer section of wall.
After moving the projector closer or farther away, refocus. Do not judge the slide while the room's main ceiling light is shining directly onto the same area. A small change to light direction can be more useful than repeatedly changing the projector position.
Small-room setup checklist
- Choose one plain wall or ceiling area.
- Place the USB power source on a stable, suitable surface.
- Keep the cable route clear of doors, bedding and walkways.
- Insert one slide and aim the flexible neck by hand.
- Reduce direct light on the projection surface.
- Turn the manual focus ring after every meaningful position change.
- Keep controls and the slide tray accessible.
Frequently asked questions
Does a galaxy projector need a completely dark room?
No. A darker room can make projected patterns easier to see, but you can keep a low, warm lamp for practical movement. Aim that lamp away from the projection surface so it does not compete directly with the image.
Should I project onto a wall or the ceiling?
Choose the clearest surface that is comfortable to view from your usual seat. A ceiling can work above a bed or lounge position, while an upper wall may suit a reading corner. Surface colour, clutter and cable routing matter more than a universal rule.
How do I make the MoonWhisper projection clearer?
Insert the slide correctly, reduce direct ambient light, aim the flexible neck and turn the ridged manual focus ring. If you change the distance to the wall or ceiling, adjust the focus again.
How is MoonWhisper powered?
MoonWhisper uses a USB-A connection. Connect it to a suitable USB power source on a stable surface, and keep the cable clear of walkways, bedding and pinch points.
What is the difference between the six-slide and twelve-slide sets?
Both options include the same projector, while the included projection-slide selections differ. Compare the current product images and pattern lists before choosing the set that suits your room.
Ready to plan your own projection corner? Compare the MoonWhisper 6-in-1 and 12-in-1 sets and choose the slide collection that suits your space.