
19 October 2026
How to Turn a Pet Photo Into a Custom Kinusaiga Keepsake
By OpenClip
Choose a clear, expressive pet photo with a readable outline, simple background and meaningful markings for a personal custom Kinusaiga pattern.
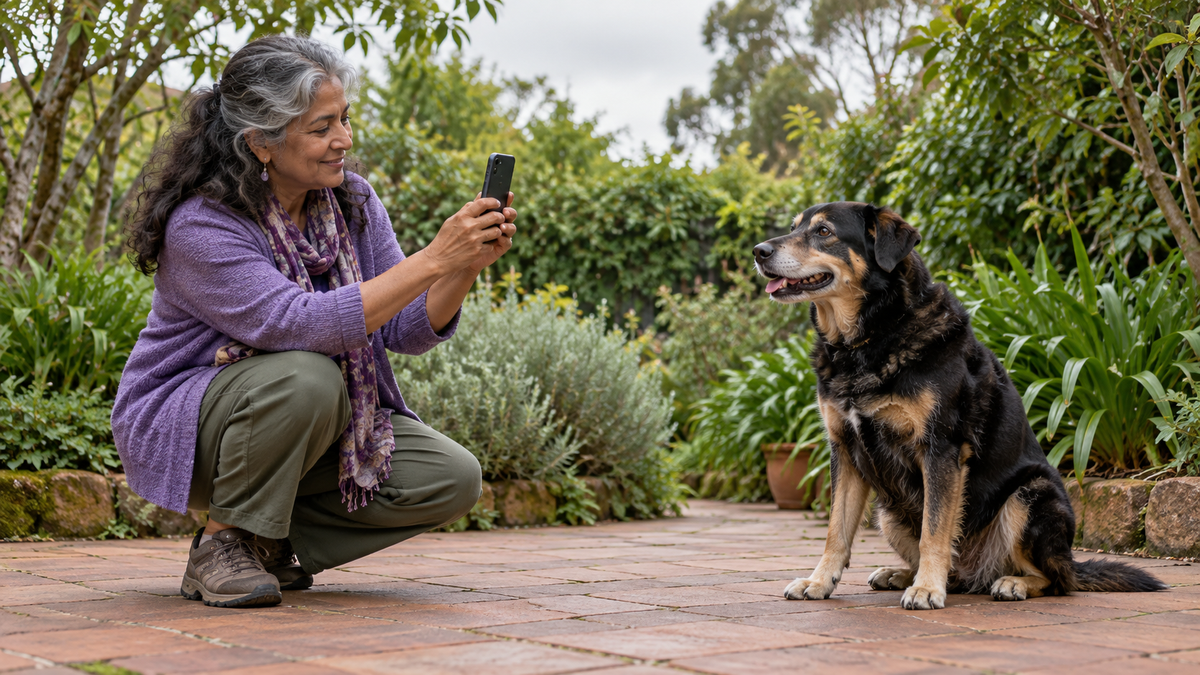
A good pet photo for a custom Kinusaiga pattern has one clearly visible animal, a readable outline and enough detail to recognise the features that matter most. You do not need a studio portrait. A calm, well-lit photograph taken at your pet’s eye level often gives the designer a clearer starting point—and helps the finished project feel personal rather than generic.
Start with the expression you want to remember
A pet keepsake is usually less about perfect photography than familiar character. Look for the head tilt, ear position, posture or steady gaze that feels unmistakably like your animal. A technically sharp image can still feel wrong if it misses that personality.
Choose two or three candidates rather than searching through every photo at once. One might show the clearest face, another the most characteristic pose and a third the colours you remember best. Comparing a small set makes the decision easier.
Choose a clear outline
Kinusaiga interprets an image through defined sections and colour areas, so the animal needs to separate from its background. A dark dog against a deep shadow, or a pale cat on a white blanket, can lose its silhouette even when the original photo looks lovely.
Look for visible space around the ears, tail, paws and body. Side light or soft outdoor shade often gives fur shape without harsh glare. If the background is busy, crop closer around the animal while leaving a little breathing room around the outline.
Keep the face readable
For portraits, the eyes, nose and direction of the head do much of the emotional work. Check the image at a small size. If you can still understand the expression, it is likely to translate more clearly than a distant or heavily shadowed photograph.
- Keep both eyes visible when the pose allows.
- Avoid motion blur around the face and ears.
- Choose a photo without a hand, lead or furniture crossing important features.
- Use the original file rather than a screenshot or heavily compressed social-media copy.
- Do not apply strong filters that change fur, eye or nose colour.
Photograph at your pet’s level
If you are taking a new photo, lower the camera to roughly the animal’s eye level instead of pointing down from standing height. This usually gives the face and body a more natural proportion. Use a calm setting your pet already knows, keep the session brief and never force a pose.
Soft window light or open shade is easier than direct midday sun. Let the animal settle, hold the phone steady and take a short sequence rather than one carefully staged shot. Safety and comfort come first; the best reference often arrives between poses.
Decide what can be simplified
A custom pattern is an interpretation, not a photographic print. Tiny whiskers, individual hairs, collar lettering and a complicated garden background may be reduced so the larger shapes remain workable. Decide which two or three details must stay recognisable—perhaps a white blaze, one folded ear or a distinctive chest marking.
Backgrounds can support the portrait without competing with it. A simple colour field, a soft curve suggesting a favourite cushion or one restrained landscape shape may be enough. If a specific detail matters, mention it in your design notes.
Build a fabric palette from the photo
Begin with broad colour families rather than matching every strand of fur. A black coat may need charcoal, soft black and a cooler highlight; a golden coat may read through ochre, honey and cream. Include one background colour that makes the animal’s silhouette easy to see.
Patterns on fabric add texture, but strong motifs can interrupt small facial sections. Save lively prints for larger body or background areas and use quieter fabrics around the eyes and muzzle. Test your choices side by side in the light where you expect to work.
What to prepare before ordering
- Your clearest original JPG or PNG, up to 8 MB.
- Permission to share and use the photograph.
- Your preferred print size.
- A short note naming the features that matter most.
- A plan for fabric, foam, a frame and tools, which are not included with the base digital pattern.
Turn your pet photo into a personal pattern
OpenClip’s made-to-order service creates a reviewed digital PDF with a numbered pattern, colour layout and suggested fabric palette. It is A$9.99 per design and is emailed within 1–3 business days. One free revision is included. The base purchase is a printable PDF only; an optional foam board and frame can be added, while fabric and tools are separate.
Plan how the finished piece will be used
A small portrait can sit on a shelf, join a personal gallery wall or become a meaningful gift for someone who knows the animal well. Decide this before choosing the crop: a close face suits an intimate display, while a full-body pose gives more context and movement.
If you are still comparing possible source images, use our broader guide to choosing a photo for a custom Kinusaiga pattern. For technique and ready-made designs, browse the current Kinusaiga collection.
Questions about pet-photo Kinusaiga patterns
Can I use a phone photo?
Yes, if the original JPG or PNG is clear, well lit and not heavily compressed. Submit the original file rather than a screenshot where possible.
Should the whole pet be visible?
Not necessarily. A close portrait can work well when the face is the focus; a full-body image is useful when posture, markings or movement matter.
Does the PDF include fabric or tools?
No. The A$9.99 base offer is a custom printable PDF sent by email. Fabric and tools are separate, and the order page currently offers foam board and frame as an optional paid add-on.
How quickly is the custom pattern delivered?
The current service states that the made-to-order PDF is emailed within 1–3 business days.
What if my photo is not suitable?
The service states that OpenClip will contact you if a different photo is needed, and one free revision is included.